
The most requested feature of the year is finally here! Dext's new Multi-account management feature eliminates the hassle by allowing you to effortlessly merge and switch between accounts under one login. Say goodbye to wasted time and frustration!
Do you or your clients have two or more login details to access two or more Dext accounts? We now provide a way to only use one set of login details to access multiple businesses or practices.
Simply verify the email address you wish to use, then merge the accounts to be able to easily navigate between the business or practices.
Multi-account management allows you to manage multiple businesses or practices under one email address, enabling you to easily navigate between your business accounts from within your Dext account.
You can combine multiple existing login details into one, while all the data in the separate businesses or practices remains untouched.
To merge login details, simply verify the email address you wish to use to manage the accounts (if not already verified), then merge logins. After merging your login details, sign in with your chosen login details, and easily switch between your businesses or practices without having to log in and out.
You can also create multiple client accounts under one email address for clients with multiple businesses. To help your clients with multiple accounts merge their login details, you can share this article with them. To create an additional account for your clients see the Creating an Additional Client Account for a Client section below.
Important to know: You can only merge your own login details, as you’ll be merging your other logins into the one you are logged into. After the merge, your main login details will be the access point to all your businesses/practices.
Merging multiple login details requires that the email address you choose to use as your only email address going forward is verified.
If the email address you’re logged in with is unverified, you’ll automatically be prompted to verify your email first.
If your email is already verified this step will be skipped.
To verify your email:
Log in to the web app with the login details you wish to keep as your unique log in credentials.
2. Go to the Manage Profile icon in the top right of the screen, then Personal Details.
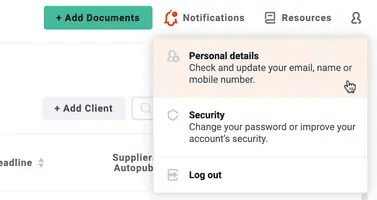
3. There will be a banner at the top of the page. Click the Resend confirmation email link.

If you don’t see the banner, it means that your email has already been verified.
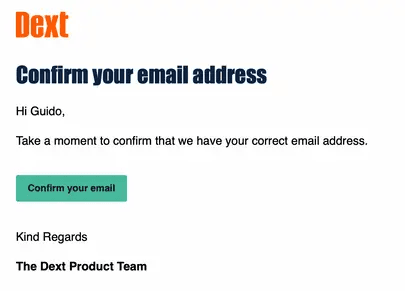
4. A confirmation email will be sent to your email address. Click Confirm your email to complete the process.
To merge accounts:
Log in to the web app with the login details you wish to keep as your unique log in credentials.
Go to the Manage Profile icon in the top right of the screen, then Personal Details.

3. Go to Merge logins and click the ‘Merge your login details so you can have a single login for Dext‘ link.

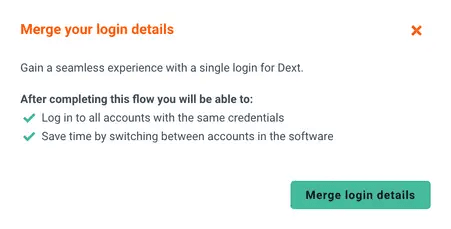
4. Read the explanation of what merging accounts will do, then click Merge login details.
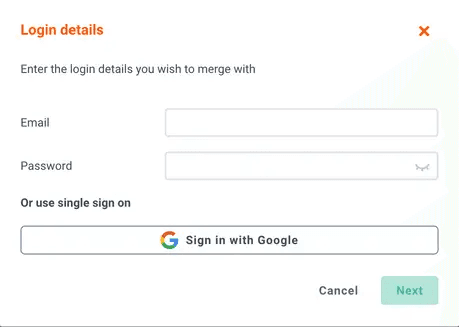
5. Enter the login details for the account you wish to merge into the one you’re currently logged into or use single sign on, then click Next.
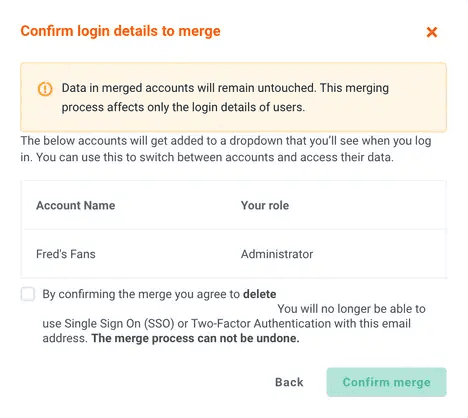
6. On the final step, we’ll ask you to Confirm merge. This will mean:
The lists of accounts you’ll be able to access with your current email address.
Confirm that the merge only affects how you log into this account and not the data within that account.
The login details for the account that’s being merged are deleted, including any potential single sign-on you might have used to access that account (e.g. Google).
You can easily switch between accounts in both the web and mobile apps with the account switcher.
In the Web app:
To navigate between different accounts:
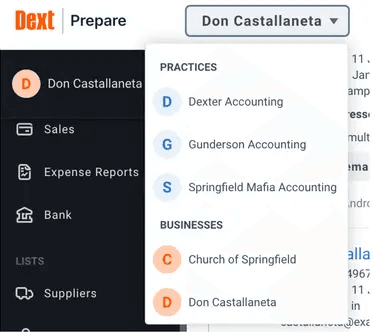
Go to the Account Switcher drop down in the top left of the page.
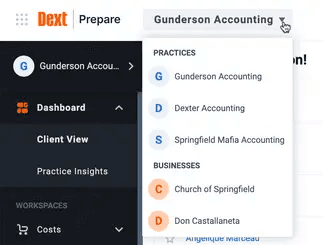
2. Then click the Business or Practice you would like to switch to.
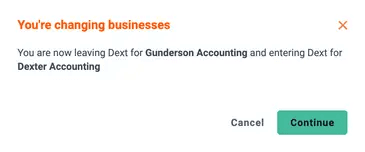
3. Click Continue to confirm you’d like to switch accounts.
In the Mobile App:
To navigate between different accounts:
Go to the Account Switcher icon in the top right of the screen.
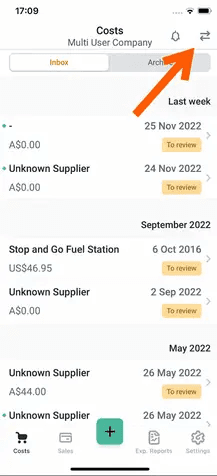
2. Select the Business or Practice you wish to switch to from the list shown.
Merging multiple login details requires that the client choose one email address to use as their only email address going forward. To do this they must first verify the email address.
Once their email address is verified, the client can then merge their accounts under the one email address.
To verify their email address and merge their accounts your client must follow the steps in this article.
If your client has several businesses they wish to have separate Dext Prepare accounts for under the same email address, they have two options – to create the new business account themselves, or to have their accountant or bookkeeper create a new client account for them.
If they wish to create it themselves they can follow the steps outlined in this article. Once they’ve created the account themselves, they can then invite you to the account if so desired.
If they would like you to create the new account for them, follow the steps outlined below:
To create a new client account for your client:
Log in to the Dext Prepare web app.
Go to My Clients in the Manage section of the sidebar.
Click the green Add Client button at the top of the page.

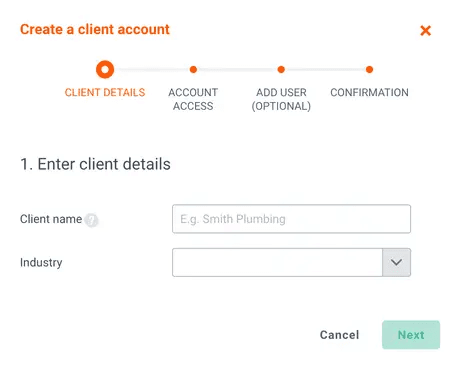
4. The ‘Create a client account’ window will then appear. Enter the client’s name or their business’ name, then select an industry category for the client if desired. When ready click Next.
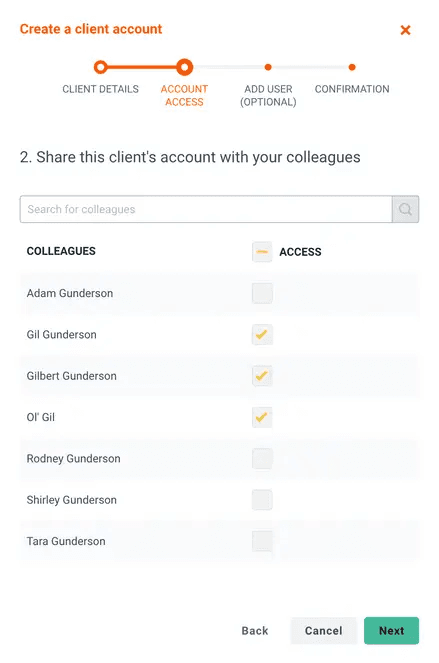
5. On the next screen, assign the members of your team access to the new client account. To do this tick the box next to the colleagues you want to give access to the new client account. To select all colleagues, tick the access box at the top of the list. When ready click Next.
Please note – if you have no other colleagues on your account then this step will be skipped.
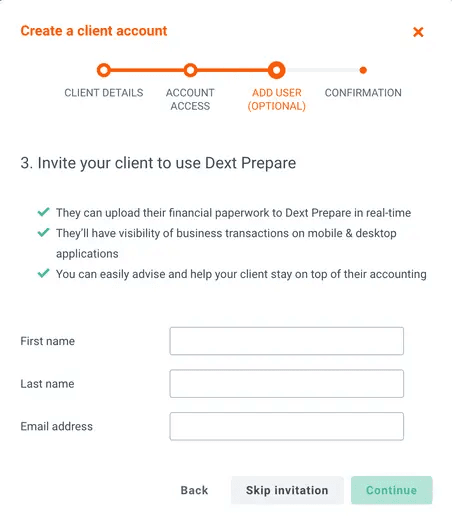
6. Next, choose whether to invite the new client to Dext Prepare immediately via SMS and/or email OR skip this step.
If you click Skip Invitation, a client account will be created and the client will be able to submit documents via their unique email in address, as well as be assigned to a document as a document owner, however they will not be able to access the Dext Prepare account themselves via the mobile or web app.
If you DO want to invite the client to access the Dext prepare account to have full visibility of their transaction data and use the various submission methods available via the web and mobile apps to add documents; add the user’s name and email address, then click Continue.
7. On the next page, add the client’s phone number if desired then, then click Invite.
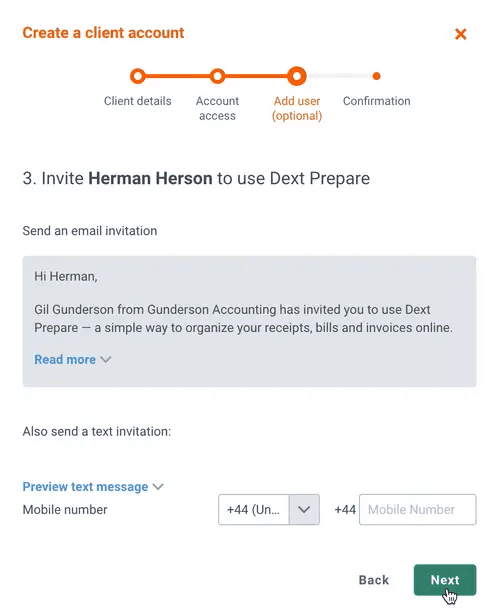
If the email address you entered is already being used by another client account, you will see a message warning you of this.
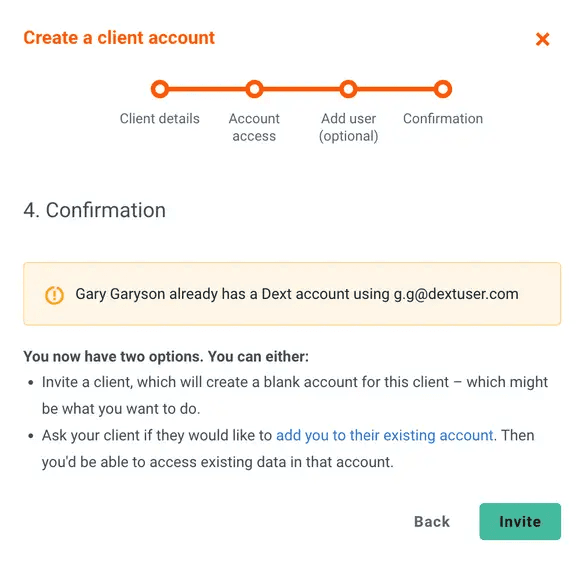
If you don’t wish to create a new account, but simply access their existing account, reach out to your client and ask them to invite you to their account. If the client has multiple businesses and you wish to create an additional account under the same email address, click Invite and create another account for the client under the one email address.
8. Finally on the confirmation page if the email address isn’t already in use, you must confirm that you’ll be adding the new client account to your client list and that an invitation will be sent to the listed email address.
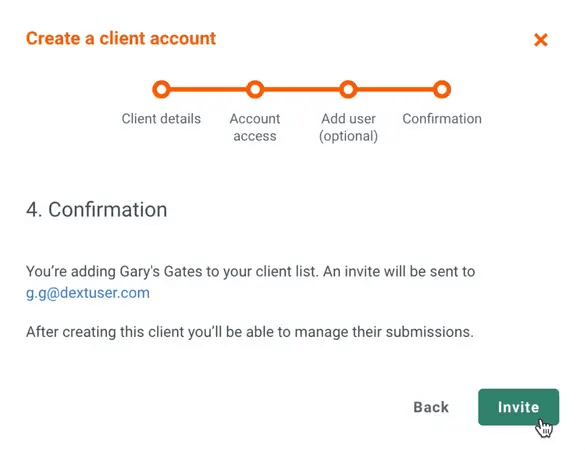
9. Once you’ve clicked Invite, the new client account will then be automatically added to your client list. The new client will have the same default values (base currency, account country) as your practice and be given email-in addresses to start submitting.
If a client invites you to access their Dext Prepare account and you have multiple practices, you can respond to their request and select which practice to connect the client with on the Client Connection Requests page.
You will receive a link to the Client Connection Requests page in an email informing you of the client’s request. The page will show all of the requests sent to you by your clients.
To respond to a request on the Client Connection Requests page:
Go to the Client and select the desired practice from the Connect to drop down.
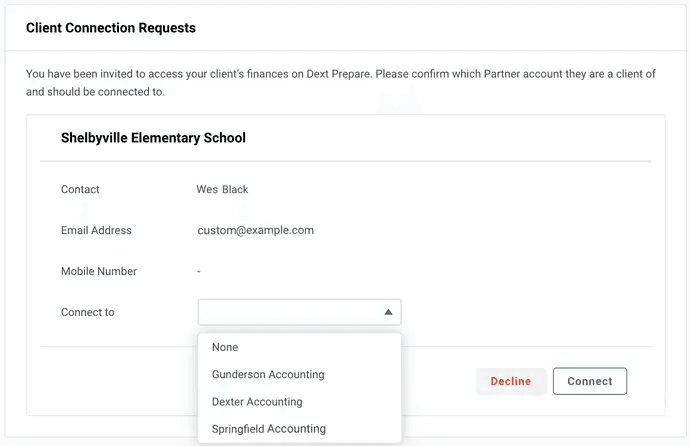
2. When ready, click the green Connect button.
Alternatively you can decline the request by clicking Decline. The client won’t be notified if the request is declined.
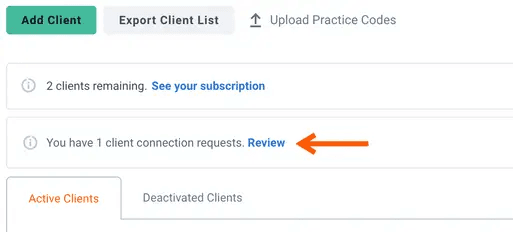
You can also access your client connection requests from within your account by going to My Clients in the sidebar, and clicking Review in the info box stating how many connection requests you have.
You can now invite existing Dext users to your accounts, which means each user can be part of multiple businesses or practices.
To invite an existing user:
Select the business you want to invite the user to from the account switcher in the top left of the page.
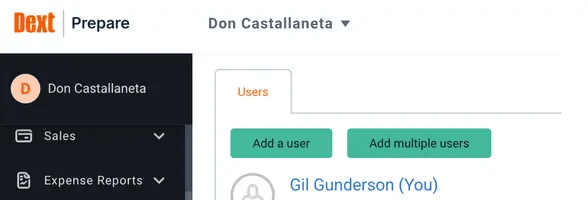
2. Go to My Team in the sidebar
3. Then click Add a user.
4. Add the User’s details, then select the User privilege level you wish to assign to the user, and finally enter the user’s email address and click Add user.
SMS invitations are not yet supported
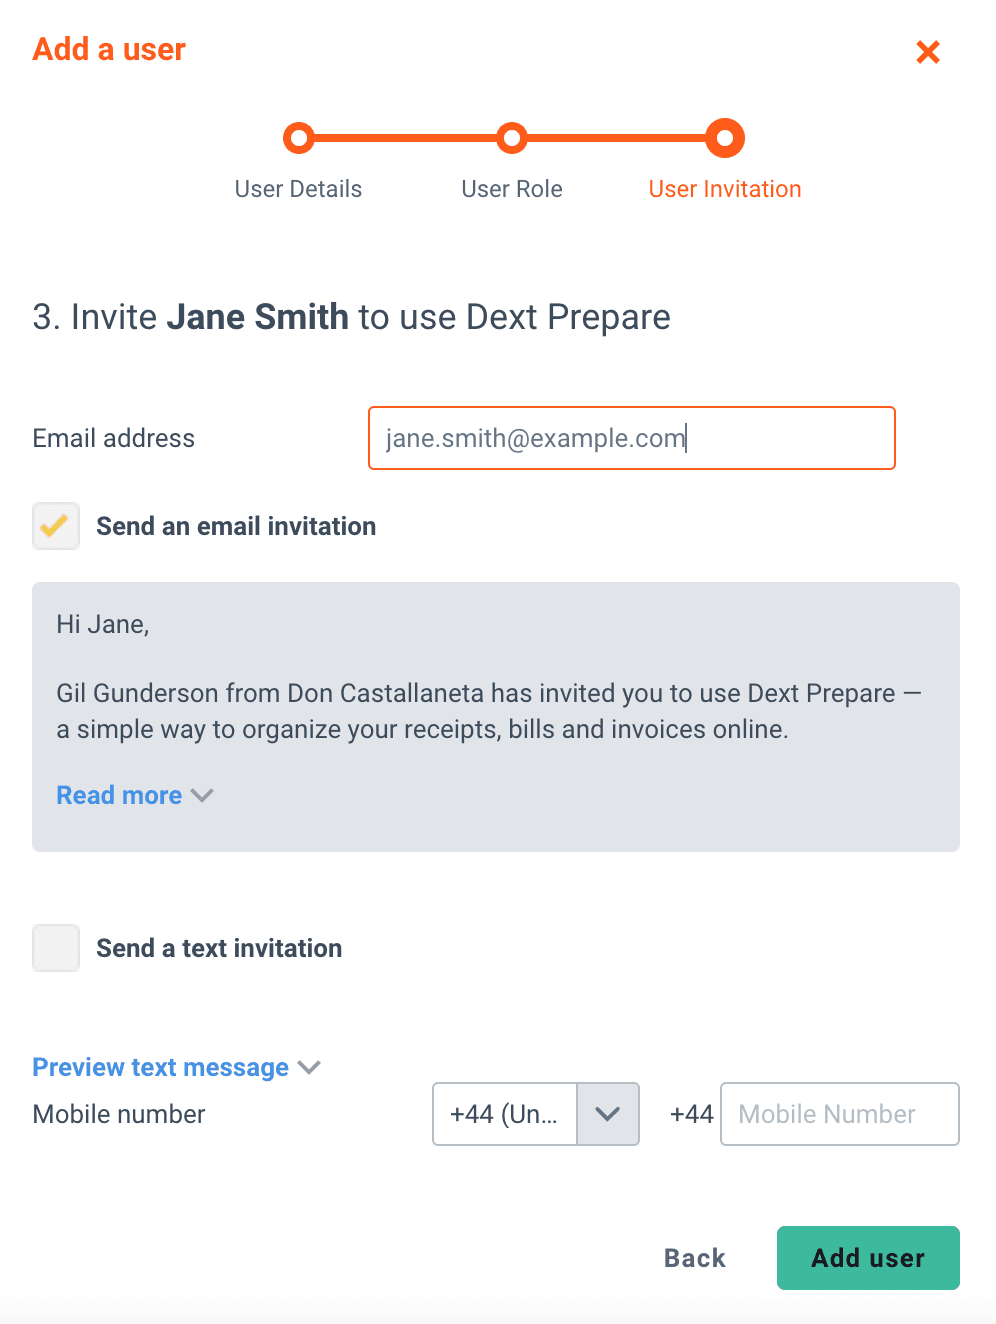
The user will then receive an invitation to join your business.
If the user you’ve invited has already verified their email address they will automatically be added to your account and they will see the account switcher when they next log into their account.
If the user you invited hasn’t verified their email address yet, their invitation status will show as ‘Pending invitation’ on the My Team page. The invitation will be active for 1 week.
Users with unverified email addresses will be created as document owners only until they accept the invitation. This means that they will not be able to see the account switcher, and that you will be able to submit documents on their behalf but they will not be able to do so themselves until they accept the invitation. Accepting the invitation will also verify their email address.
You can re-invite the user from the Manage dropdown, or Cancel the invitation if needed when it’s still in the pending state (for instance if you misspelled the email address or invited the user by mistake).
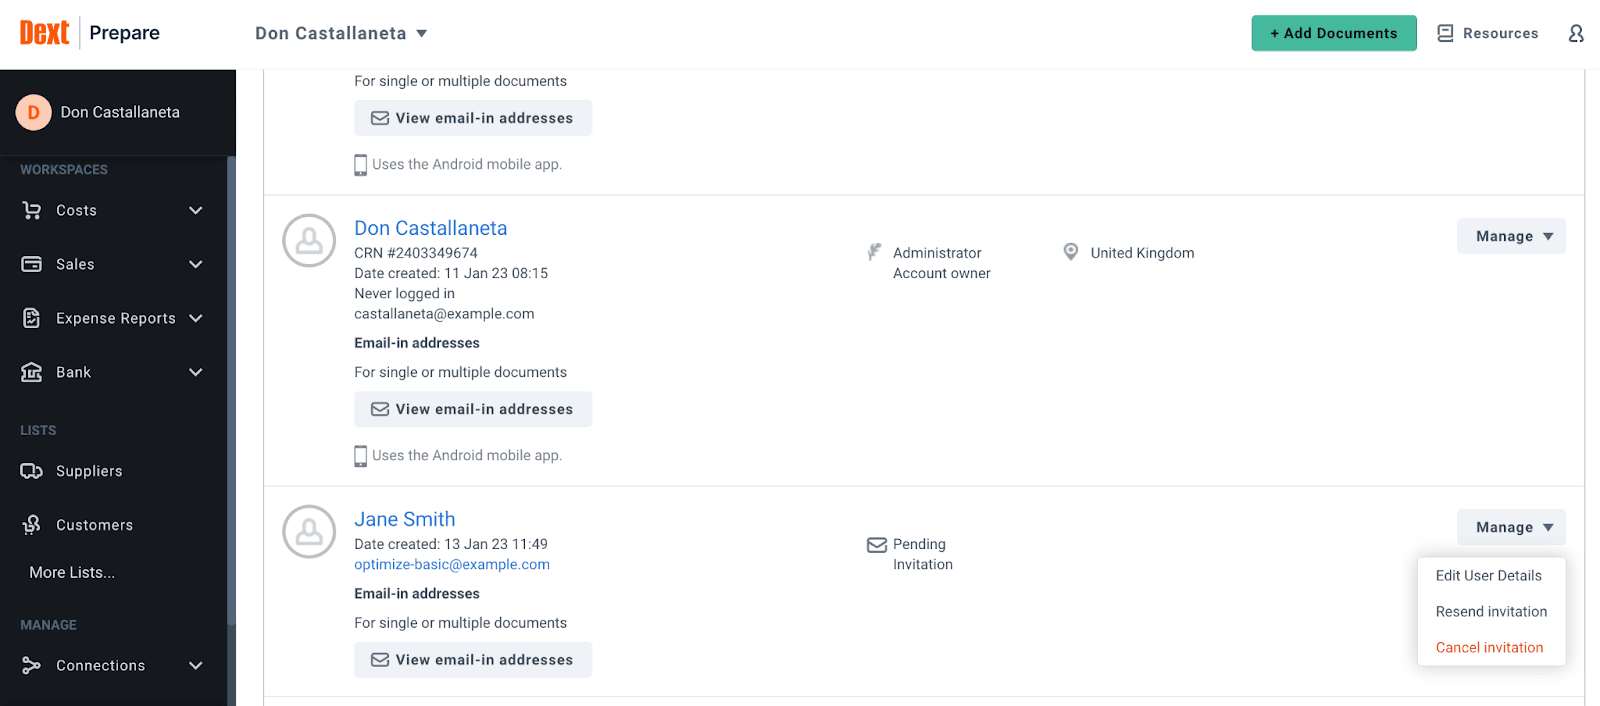
Note: Once the user has accepted the invitation, their email address will be verified and you will no longer be able to change their email address or password (the user will be able to do so themselves).
Latest news, events, and updates on all things App related, plus useful advice on App advisory - so you know you are ahead of the game.